

Building a Deck: Slides, Themes, and Layouts
This guide teaches how a deck takes shape: the slide browser you build from, the themes and layouts that give it a consistent look, and the templates that keep a team on brand. After it you will be able to add and rearrange slides with confidence, choose a coordinated theme, arrange the frames on a slide with a layout, and capture your own slide as a template your colleagues reuse. It also settles the question brand and enablement teams ask first: what a theme changes, what a layout changes, and whether a saved template really holds the layout when someone else personalizes it.
The Slide Browser
After this section you will build and reorder a deck fluently. The slide browser is the rail down the left of the editor. It shows a live thumbnail of every slide, rendered from the real text, shapes, and images on it rather than a generic placeholder, so you can see the deck at a glance and navigate it by sight. Click a thumbnail to make that slide the one you are editing; the selected slide is marked with a highlight ring, and slide numbers run down the gutter.
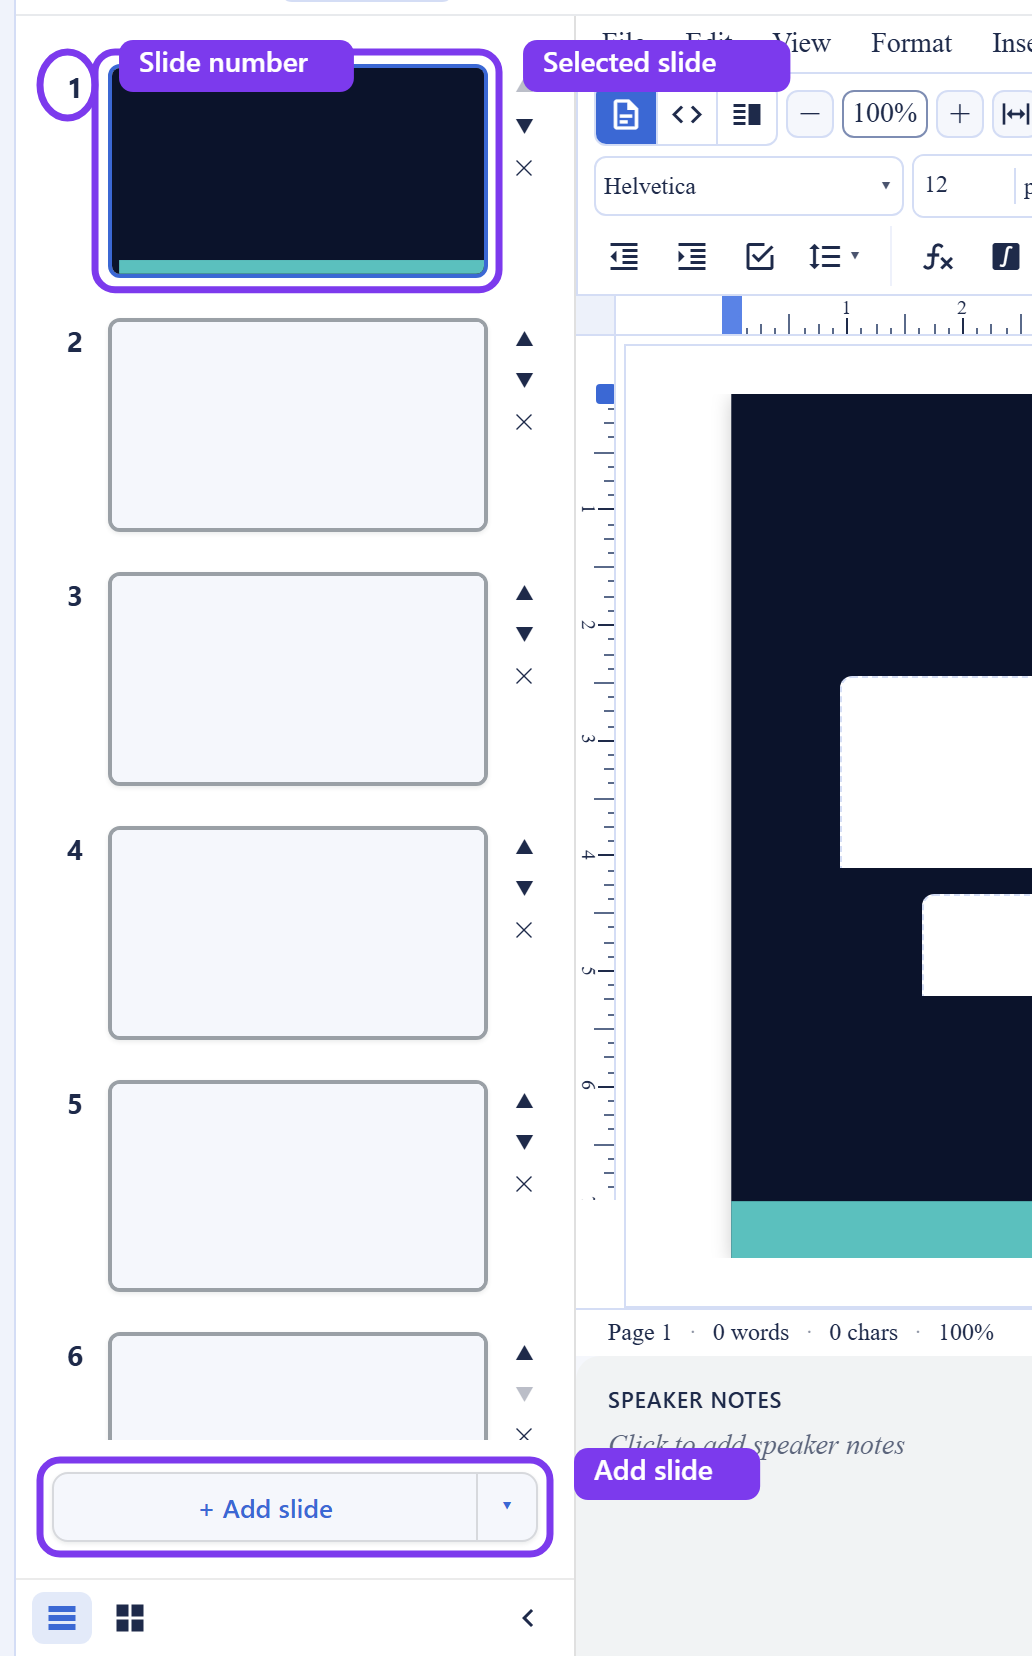
Everything you need to shape the deck is on the rail or one right-click away:
- Add a slide: the Add slide control at the bottom of the rail. Its main button adds a blank slide; the caret beside it opens a menu to add a slide already filled with a built-in layout or one of your saved templates.
- Insert, duplicate, and delete: right-click any slide for New slide above, New slide below, Duplicate, and Delete. Per-row buttons move a slide up or down, and drag a thumbnail to drop it anywhere in the order, with a clear drop indicator showing where it lands.
- Cut, copy, and paste slides: the right-click menu carries Cut, Copy, and Paste for whole slides, so you can lift a slide out of one place and drop it into another. Paste is available once you have copied or cut a slide.
- Skip a slide: mark a slide Skip to keep it in the deck but leave it out of the show. Skipped slides are omitted when you present, which is how you keep an appendix or a backup slide handy without it interrupting the talk. Unskip restores it.
- Change a slide background: right-click, choose Change background, pick a color, or reset it to the theme default.
When a deck has only one slide, Delete and Cut are unavailable, because a deck always keeps at least one slide. If you open a deck you can view but not edit, the rail becomes pure navigation: the add, delete, drag, and right-click controls are hidden, so you can move through the deck without any risk of changing it.
Two Ways to See the Deck
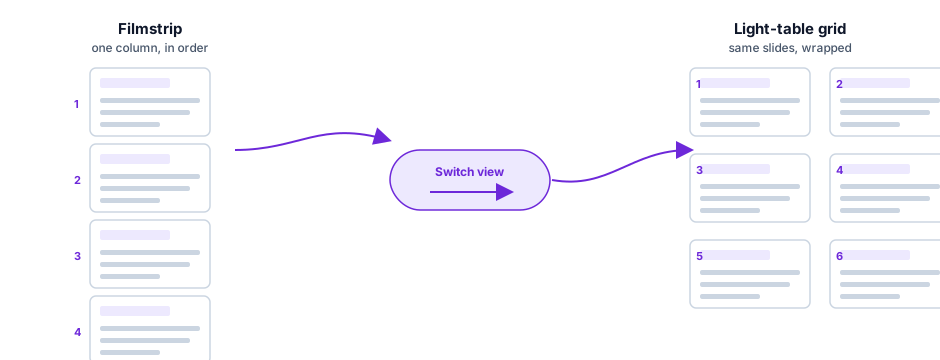
After this section you will pick the view that fits the task. The browser has two layouts. The default filmstrip stacks the slides vertically for building and navigating in order. A view toggle switches to a wrapping two-column grid, a light table that shows more of the deck at once, which is the view you want when you are reordering a long deck or checking its overall flow. The rail is yours to size: drag its edge to widen or narrow it, or collapse it to a thin strip to give the canvas the whole window.
Slide Size: 16:9 and 4:3
After this section you will set the right canvas shape for the room. A new deck opens at widescreen 16:9, the shape of nearly every modern screen and projector, so the deck fills the display without black bars. A 4:3 profile is also available for the rare screen or handout that calls for it. The size applies to the whole deck, so every slide shares one canvas shape.
Themes: One Coordinated Look
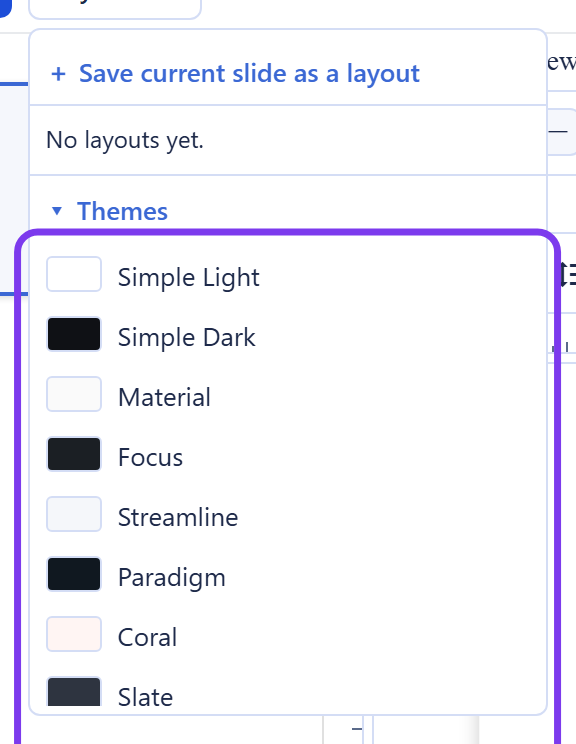
After this section you will give a deck a consistent, professional look in one click. Open the Layouts menu in the slide action bar to reach the theme gallery. Backbuild Slides ships ten built-in themes, Simple Light, Simple Dark, Material, Focus, Streamline, Paradigm, Coral, Slate, Forest, and Midnight. Each theme is a coordinated background color together with title and subtitle frames, so applying one recolors the slide and sets a consistent type treatment. A theme is the look; you keep full control of the content on top of it, and you are never locked into a single generated theme the way a prompt-only generator leaves you.
Layouts: Arrange the Frames
After this section you will know exactly what a layout does and does not change. A layout arranges the frames on a slide: it decides whether the slide has a title, a body, two columns, a caption, or a single centered point. Backbuild Slides ships eight layouts:
- Blank: an empty canvas to build freely.
- Title slide: a large title with a subtitle, for the cover.
- Title and body: a heading over a content area, the everyday content slide.
- Title only: a heading with the rest of the slide open for your own objects.
- Section header: a divider that announces a new part of the talk.
- Title and two columns: a heading over two side-by-side content areas.
- Caption: a large object area with a caption, for an image or a figure.
- Main point: a single centered statement, for the one thing you want the room to remember.
You apply a layout two ways: add a new slide already arranged with one from the Add slide caret menu in the browser, or right-click an existing slide and choose Apply layout to rearrange its frames in place. Both offer the eight built-in layouts and any templates you have saved.
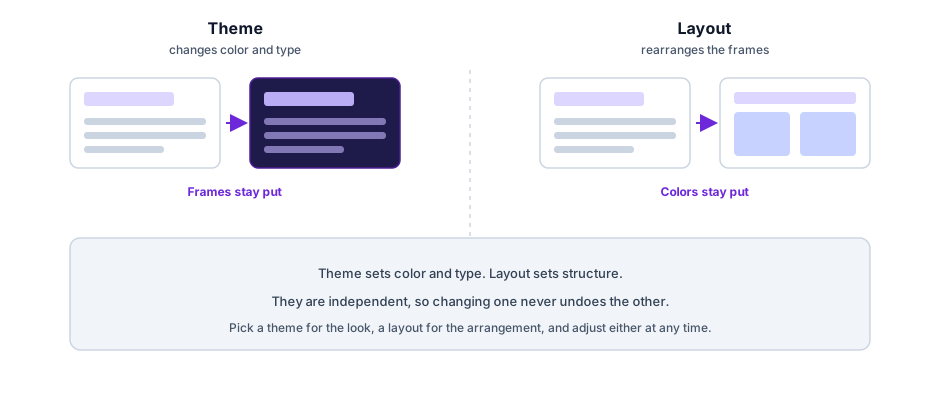
This is the distinction to hold onto: a layout changes structure, the arrangement of frames, without recoloring or resizing the slide, while a theme carries color and geometry. Applying a layout will not silently override your theme's colors, and applying a theme will not scramble your content. You choose the look with a theme and the structure with a layout, independently.
Save Your Own Design Templates
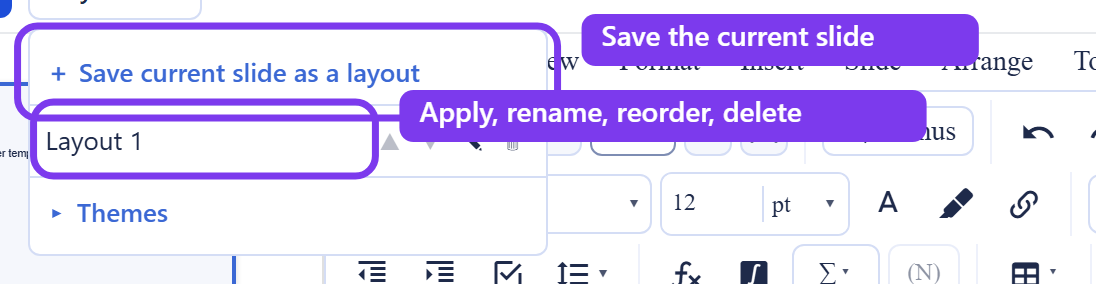
After this section you will turn a slide you designed into a reusable template. When you have a slide styled exactly the way your brand wants it, open the Layouts menu and save the current slide as a design template. It joins the saved-templates list, where each saved template has its own controls: Apply it to a slide, Rename it inline, Move it up or down in the list, or Delete it. Applying a template lays its frames and styling onto a slide with fresh content areas, so you get the approved structure every time and fill in the words.
This is the answer to the brand-consistency problem: instead of every team rebuilding a slide from memory and drifting off brand, you capture the correct slide once and everyone applies it. A rep personalizing a pitch works inside the frame you set rather than around it, so the deck stays on brand while the content changes per opportunity. You can also add a new slide straight from a saved template using the Add slide caret menu.
Will applying a layout recolor my slide? No. A layout only rearranges the frames on the slide, whether it has a title, a body, two columns, and so on. Color and type come from the theme. The two are independent, so applying a layout never overrides your theme and applying a theme never scrambles your structure.
Are the templates I save shareable across my team, or stuck in one file? A saved design template is captured for reuse and applied by anyone building a slide, so a team works from the same approved slide rather than rebuilding it from memory. That is what keeps personalization inside the brand frame.
Can I keep a backup or appendix slide without it showing in the talk? Yes. Mark it Skip. It stays in the deck and in the editor but is left out when you present, so you can jump to it if a question comes up without it interrupting the flow. Unskip puts it back in the running order.
Can I reorder a long deck quickly? Switch the browser to the two-column grid to see more slides at once, then drag thumbnails into the order you want. The drop indicator shows exactly where a slide will land.
Where to Go Next
- Adding Content: Shapes, Charts, Diagrams, and Media: fill the frames with real visual content and arrange it precisely.
- Transitions, Animations, and Speaker Notes: bring the slides to life and script your delivery.
- Collaboration, Comments, Sharing, and Governance: build the deck as a team and control who can change it.