

Subscribing to Backbuild Miles, Step by Step
This page walks the whole purchase from start to finish: where you start it in the app, how the app hands you to the Backbuild web app to complete the sale, how you pay securely, and how you confirm coverage is active. The mobile app never collects payment itself; it opens the web app in your browser, signs you in for you, and reflects the new coverage automatically once the payment succeeds. For what a subscription actually buys and how the pricing works, see Backbuild Miles Free Trips and Subscriptions.
Step 1: Open the Subscription Screen
After this step you will be looking at your current plan and the available terms.
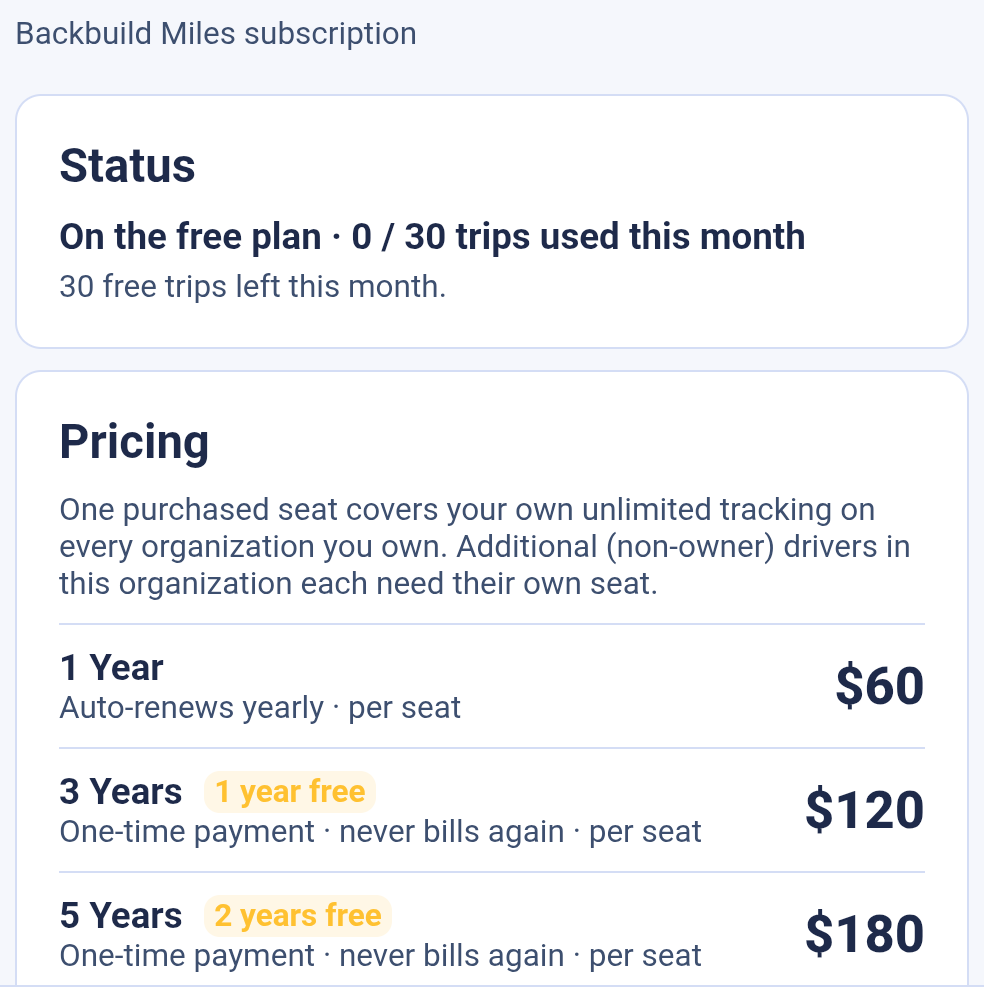
In the Backbuild Miles app, open the Account tab and choose Subscription. The screen opens on your current status. Before you subscribe, the status reads that you are on the free plan, with your remaining free trips for the month, followed by the list of per-seat terms.
Step 2: Choose a Term and Tap Subscribe
After this step the app will hand you to the web app to finish the purchase.
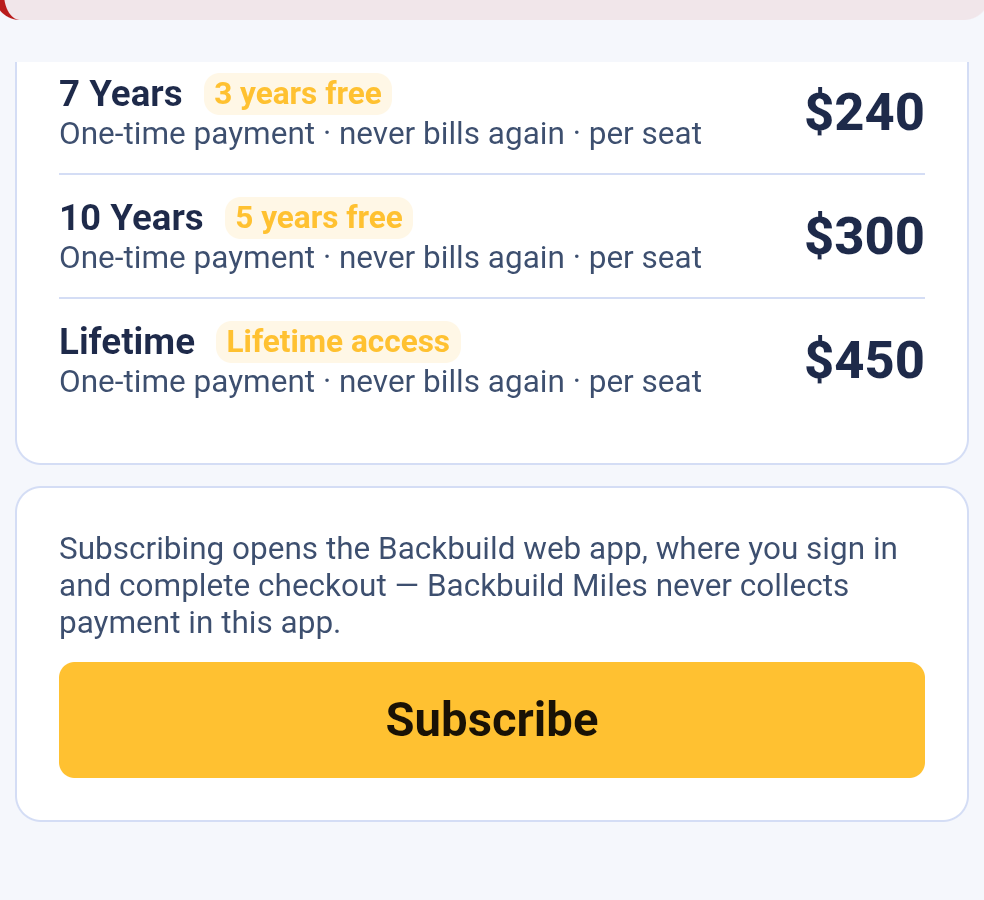
Scroll the terms to see all six: the one year plan that renews yearly, and the three, five, seven and ten year and lifetime plans that are a single up-front payment with no renewal. When you tap Subscribe, the app opens the Backbuild web app in your browser. As the screen states, Backbuild Miles never collects payment inside the mobile app itself; the purchase is completed on the web, and this hand-off is what makes that happen.
Step 3: The Purchase Page Opens in Your Browser, Already Signed In
After this step you will be on the purchase page for your organization, without signing in again.
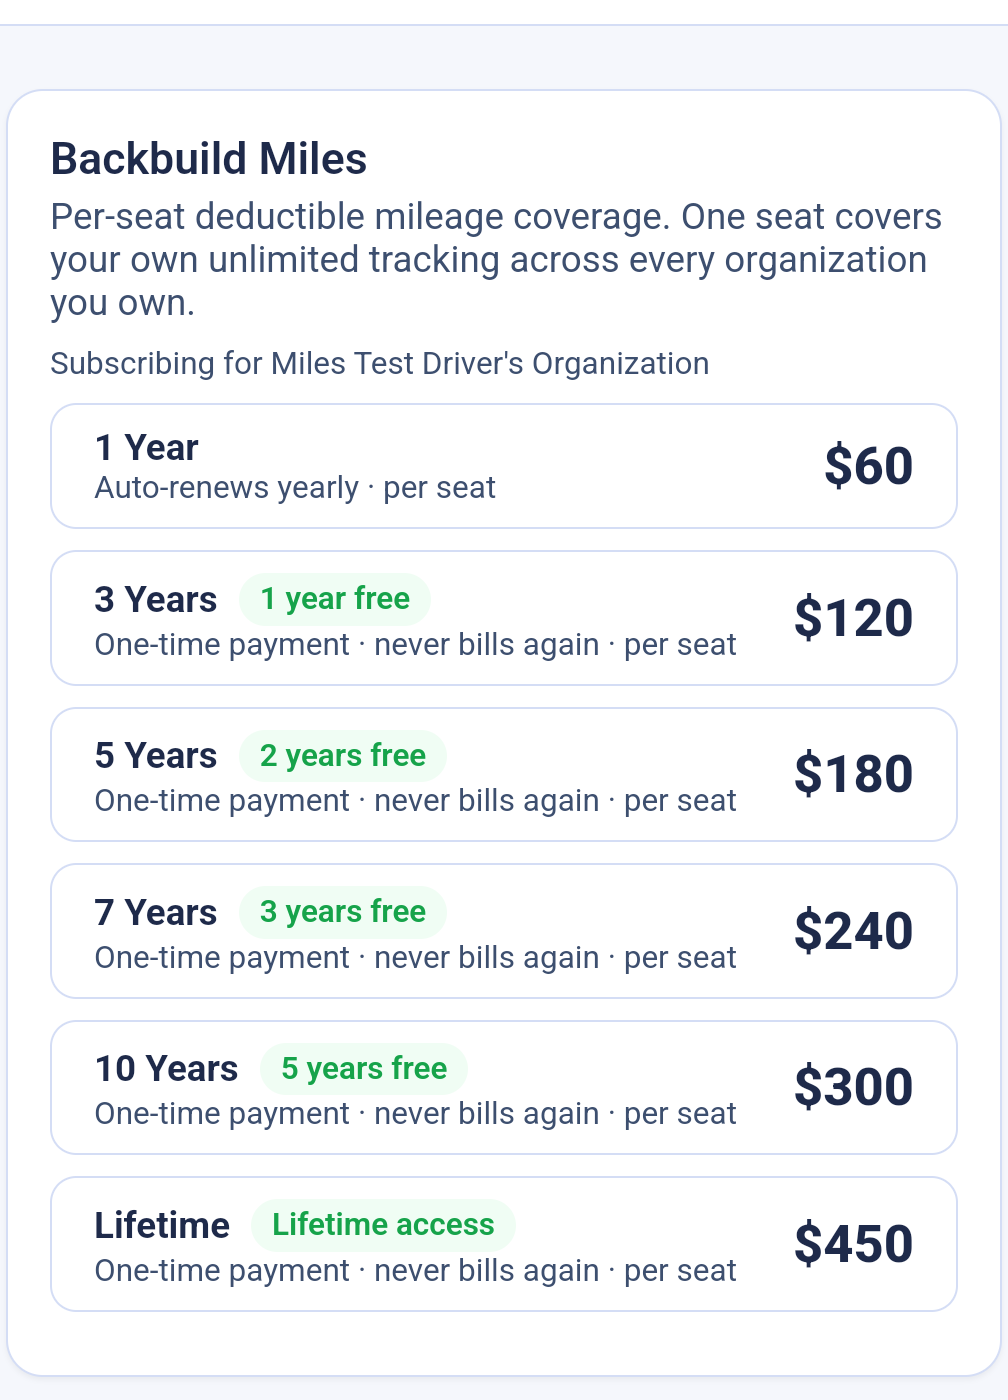
The app opens your browser directly on the purchase page for your organization and signs you in for you, so you land ready to buy rather than at a login screen. The page shows the Backbuild Miles plan and every term, and names the organization the seat will cover.
Step 4: Choose Your Term and Seats
After this step you will have your term selected and be ready to pay.
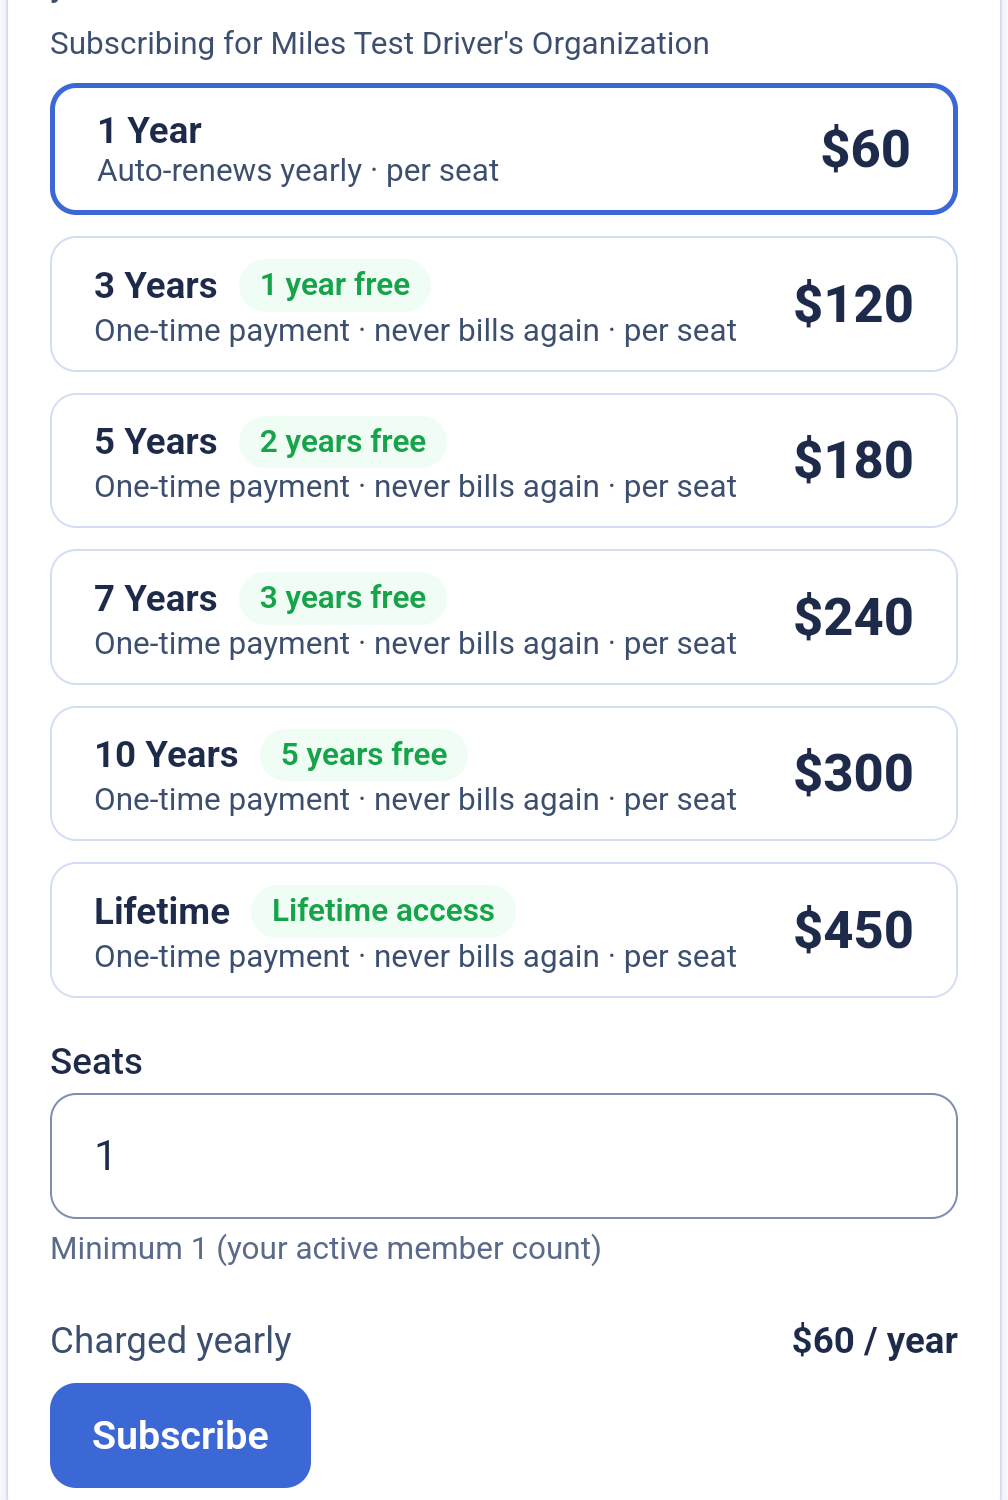
Select the term you want. A seats field appears, defaulting to one, which is the seat that covers you across every organization you own; raise it only if other people also drive for this organization and each needs their own seat. The running total updates as you change the term or the seat count. Choose Subscribe to continue to secure payment.
Step 5: Pay Securely
After this step your payment is submitted for processing.
Payment is handled on Stripe's secure checkout, so your card details are entered on Stripe's page, never stored by the app. The page confirms what you are buying and the price, then collects your card and billing address. Enter your details and confirm to submit the payment.
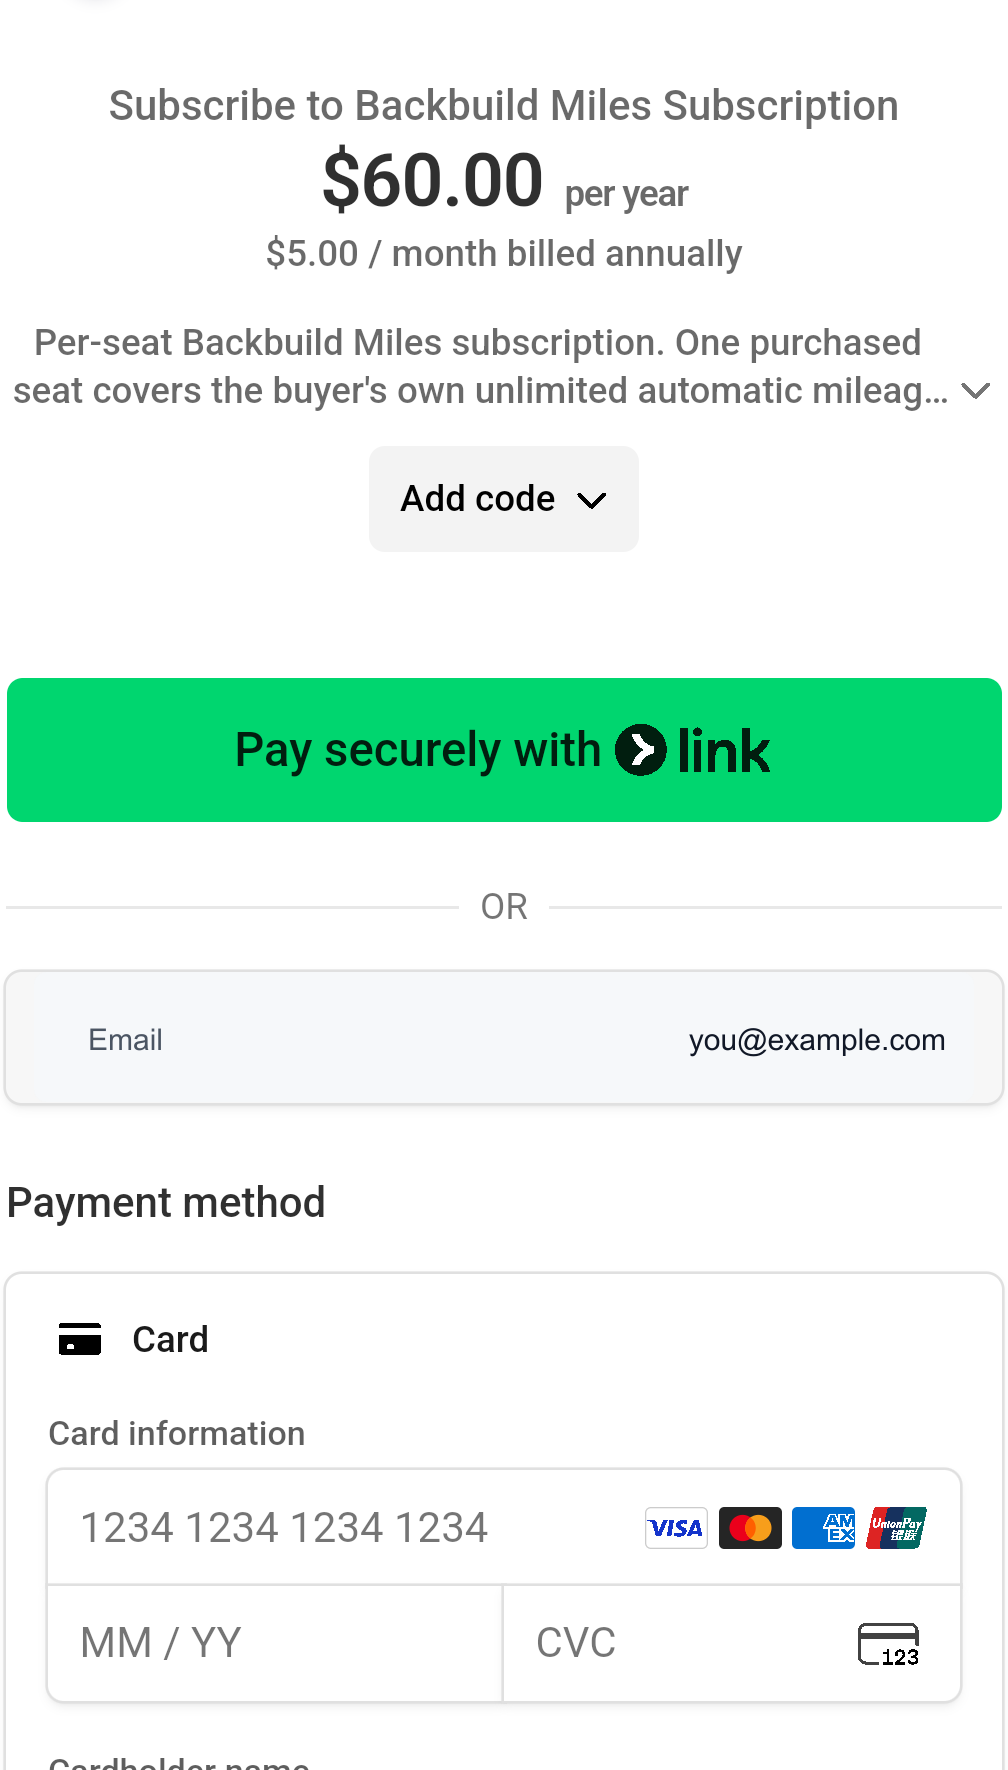
Your subscription does not change until the payment actually succeeds. The coverage is applied only after Stripe confirms the charge went through, so a card that is declined or a checkout you abandon leaves your plan exactly as it was.
Step 6: Coverage Is Active
After this step you will see your coverage reflected back in the app.
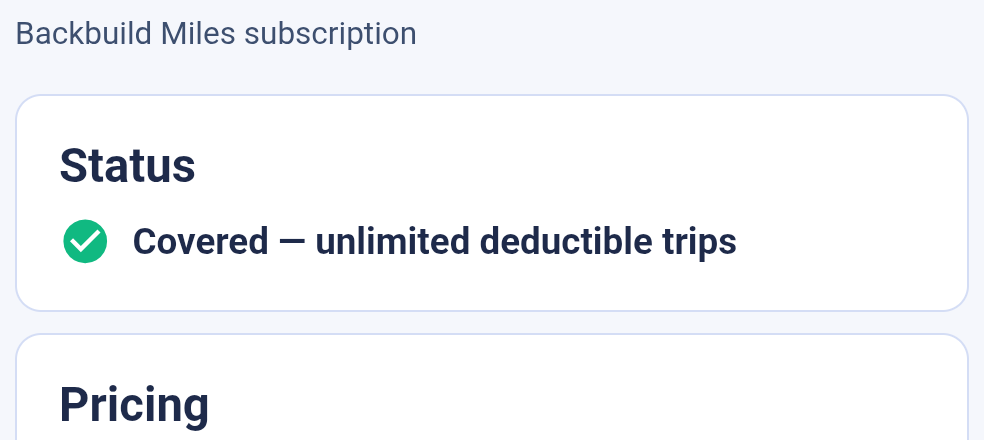
When the payment succeeds, your browser returns to Backbuild and the mobile app picks up the new coverage on its own. Open the subscription screen again and the status now shows that you are covered, with unlimited deductible trips and the monthly limit no longer applying. Any trips that had been held for being past the free allowance are brought into your deductible totals at the same time.
Your Invoice and Finances Record
After this section you will know where to find proof of the purchase.
A recurring yearly subscription produces an invoice you can view and download from your billing history, marked paid with the amount and date. A one-time multi-year or lifetime purchase is a single charge rather than a recurring invoice, so it is recorded as a paid entry rather than a renewing invoice. Either way, the purchase also posts to your organization's Backbuild Finances as a balanced accounting entry named for the Backbuild Miles subscription and the term you bought, so the cost lands in your books without any manual entry.
Common Questions
Why does the app send me to a browser to pay?
Backbuild Miles never collects payment inside the mobile app. Tapping Subscribe opens the Backbuild web app, where the sale is completed on Stripe's secure checkout. The app signs you in for you, so you land on the purchase page for your organization rather than at a login screen.
Do I have to sign in again on the web?
No. The hand-off carries a single-use, short-lived code that signs you in automatically, so you arrive already authenticated on the purchase page. Only that opaque code travels in the link; your password and your session tokens never do.
When does my plan actually change?
Only after the payment succeeds. Coverage is applied when Stripe confirms the charge, so a declined card or an abandoned checkout leaves your plan unchanged. You do not get charged and upgraded out of order.
Where do I find my receipt?
A recurring subscription leaves an invoice you can view and download from your billing history. Every purchase, recurring or one-time, also appears as a paid accounting entry in your organization's Backbuild Finances.
How many seats do I need?
One seat covers you across every organization you own, so most people buy a single seat. Add a seat for each additional person who drives for one of your organizations. See Backbuild Miles Free Trips and Subscriptions for how seats and coverage work.
Where to Go Next
To understand what a subscription buys and how the free allowance works, see Backbuild Miles Free Trips and Subscriptions. To manage the organizations a seat covers, see Your Backbuild Miles Account and Organizations. To see the deductible mileage and exports your subscription unlocks, see Backbuild Miles Reports and Exports.