

Buy Usage Credits
Add usage credits by choosing a package for an organization you own. This guide shows you what to check before paying and how to investigate a purchase whose result is unclear.
Choose the right organization and package
- Open your user settings and select Personal Organizations. You can also choose Buy usage credits from Billing & Usage.
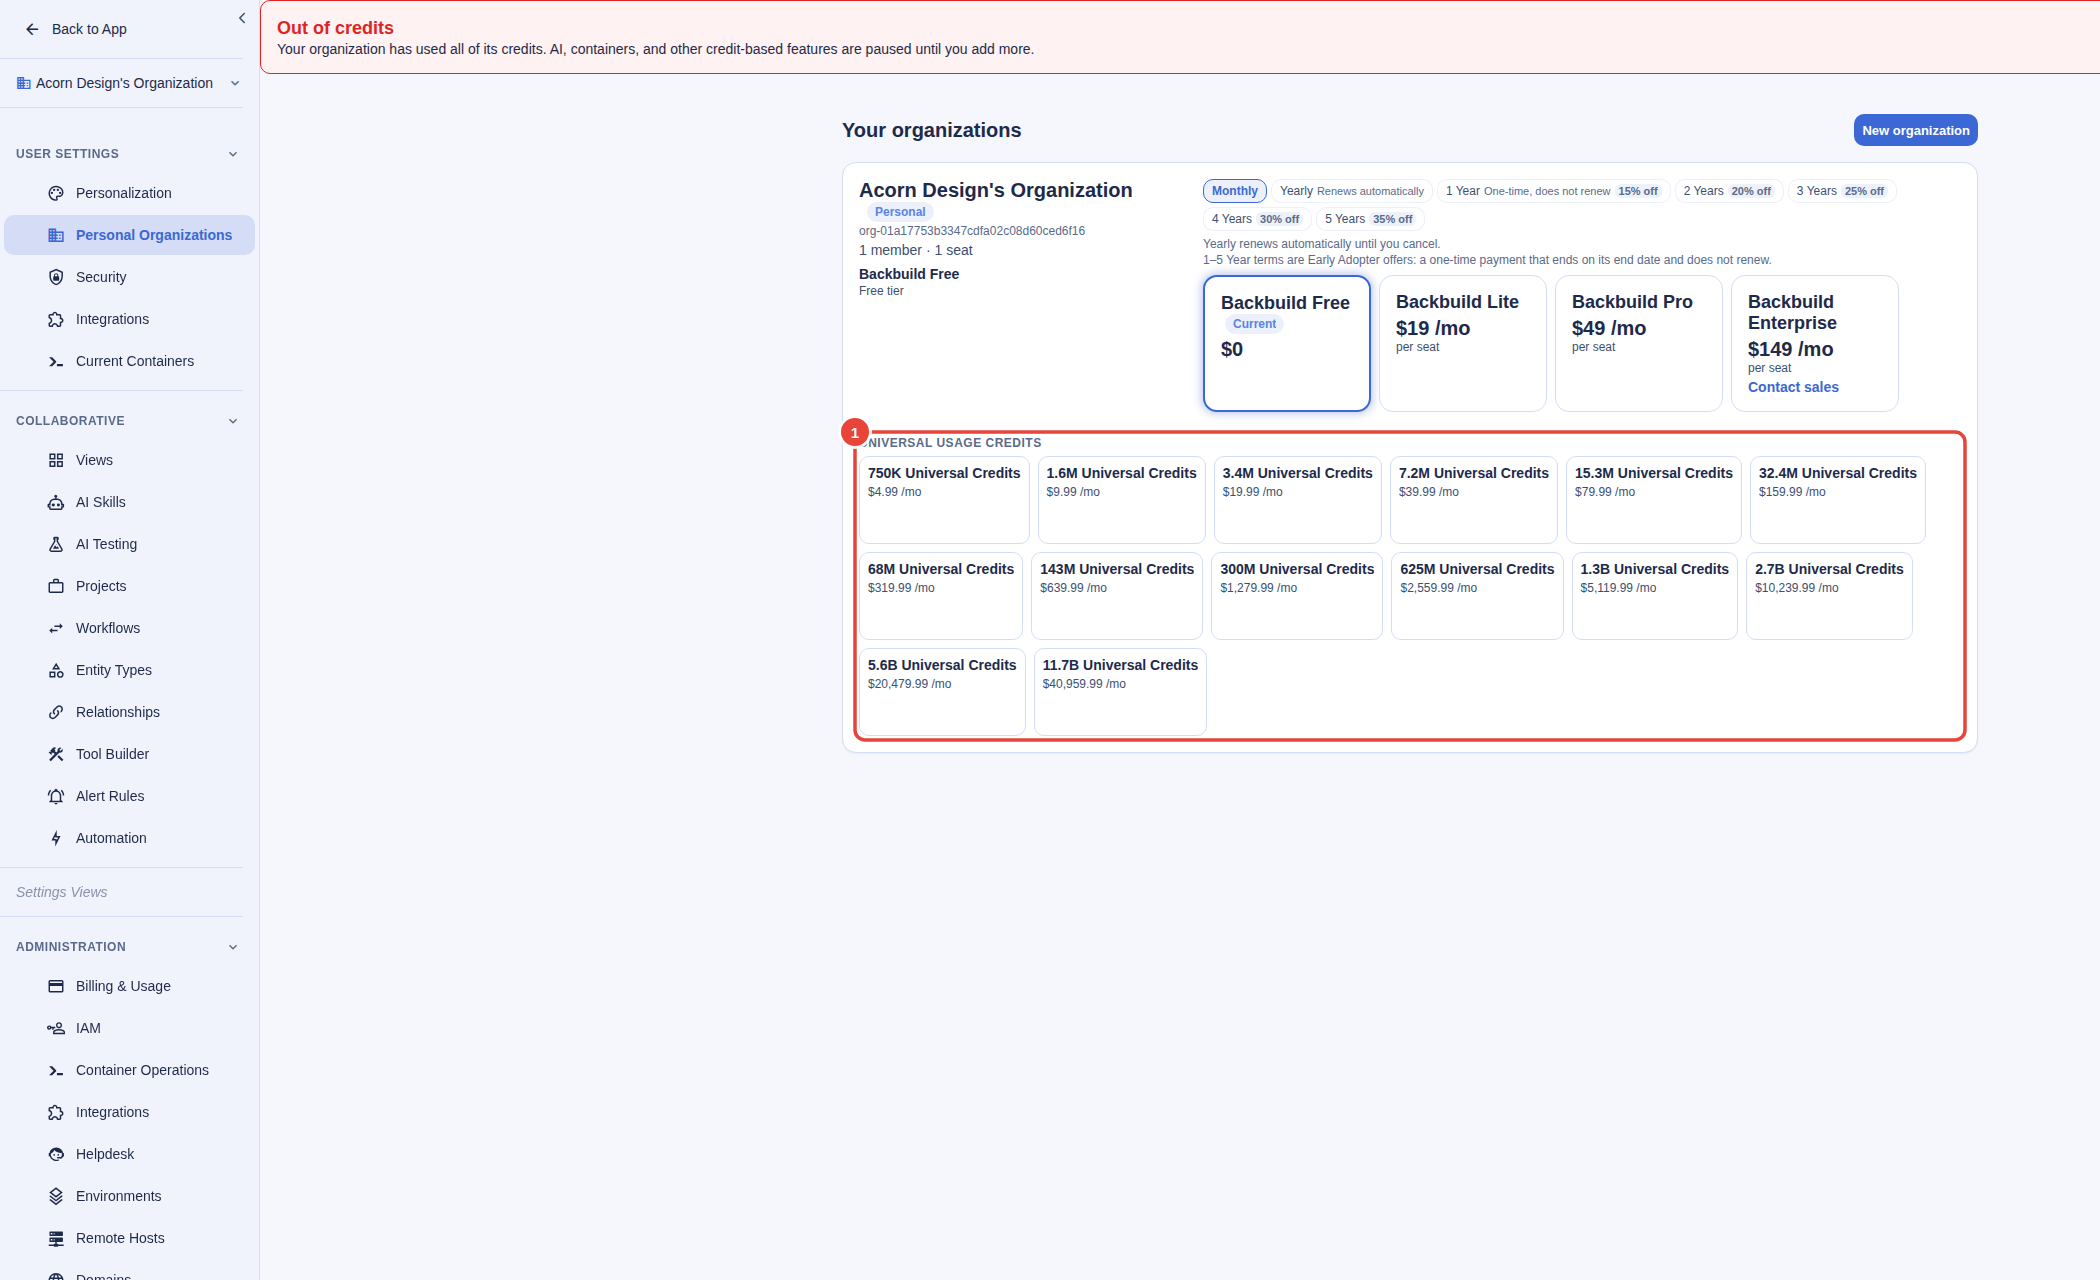
- Find the card for the organization that will use the credits. Check its name before selecting anything. This screen lists organizations you own.
- Scroll to Universal Usage Credits on that card. Choose the package you want to review. Read the available credit amount and price; choosing a package first opens a confirmation.
Compare the offered packages with current prices. Use Universal Usage Credits to understand what credits cover. A credit package and your organization's main plan are separate choices. If the organization is missing, ask its owner to manage the purchase rather than buying for a different organization.
Review the charge before continuing
In Confirm purchase, check the selected option, quantity, Billing frequency and Charge or One-time total. Use the frequency shown in this confirmation; do not assume it matches the frequency selected for your main plan. Read any renewal information before proceeding.
If the confirmation offers Raise my monthly budget cap by these credits, review that choice too. Keep it selected only if you want the purchase to raise your configured cap. Choose Cancel to return without starting checkout.
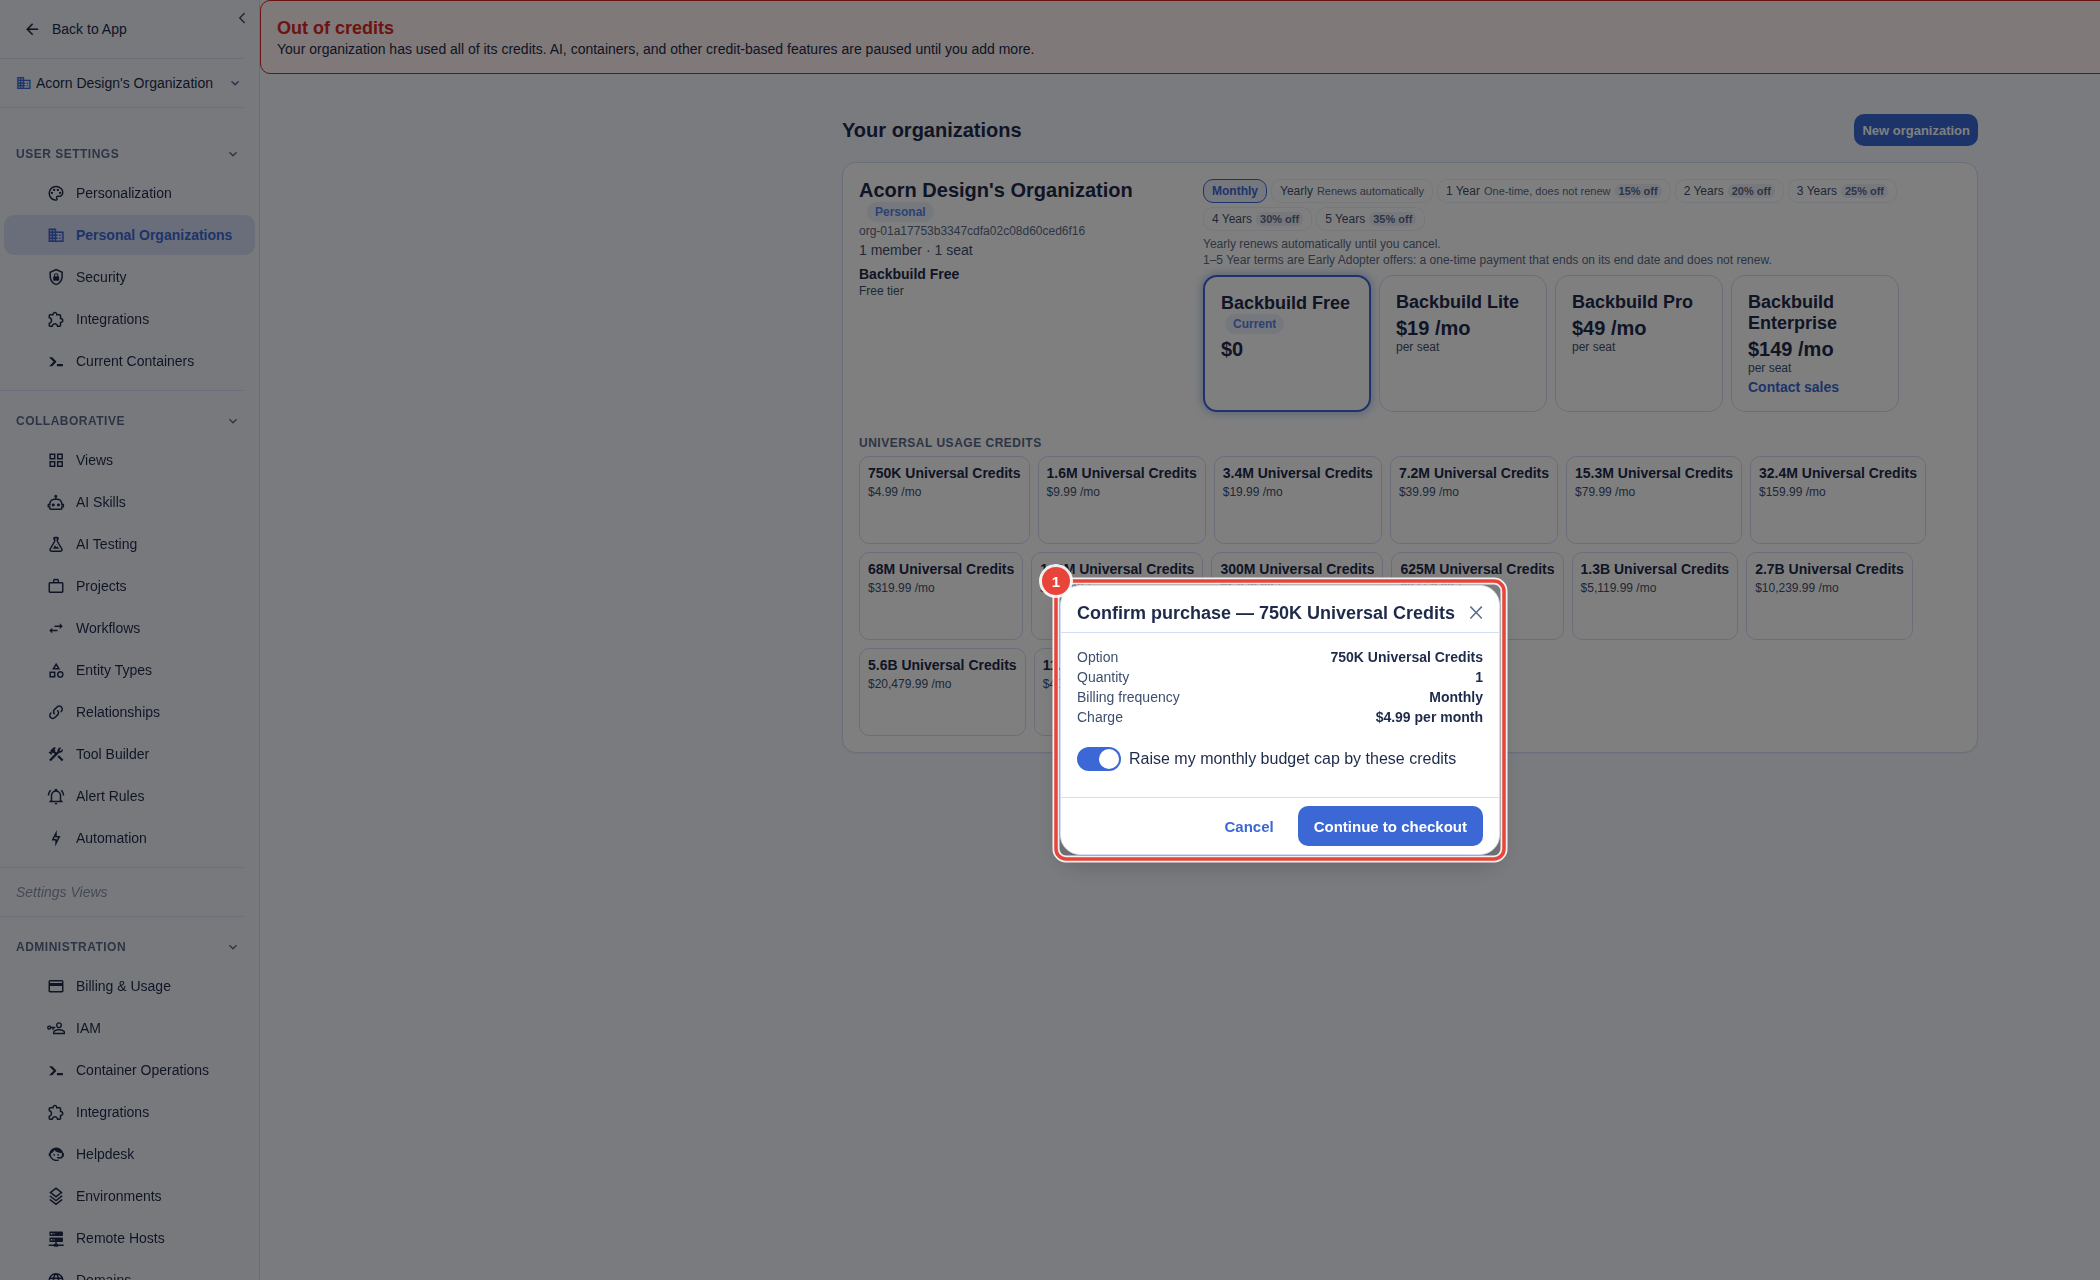
When the details are right, choose Continue to checkout to open Stripe Checkout. Review the total and payment terms there, complete any requested card verification, and submit only when you intend to pay. If checkout cannot start, read the message before trying again. An option shown as unavailable is not made available by repeatedly selecting it.
Check the payment result and available credits
After checkout, return to Personal Organizations and check the same organization's card. It can show a finalizing state while the purchase updates. Returning to the app, closing a tab or seeing a bank notification alone does not tell you that the credits are available.
- Check the payment result shown by checkout and retain the payment reference.
- Open that organization's Billing & Usage and read Credits remaining.
- Inspect Credit history, using All activity when checking for an addition. Follow the balance and history guide to compare the relevant dates and amounts.
A loading indicator or an error is not a zero balance. If payment appears complete but credits are missing, reload the affected screen and check the organization and history. If the result is still unclear, ask for help before starting another purchase. A lost connection or closed checkout tab does not, by itself, establish that a payment failed.
Resolve a payment question
Use Backbuild Helpdesk for a missing credit addition, unexpected charge or refund question. Include the organization, package, date, amount, payment reference and the message you saw. Describe what Billing & Usage shows. Leave out passwords, authentication codes, full card numbers and card security codes.
Does canceling a recurring package refund the last payment?
Cancellation and a refund are separate actions. For a recurring package,
review its cancellation and renewal details when managing it. Ask Helpdesk
about a payment you want investigated; do not assume cancellation has
refunded it.
Why has an approved refund not appeared at my bank?
Bank processing can take time. A refund may also appear as a reversal of
the original charge rather than a separate credit. Use the refund
confirmation and payment reference when asking for its status.
Stripe's refund guidance
explains these differences.